

Enable the action you need
1
Choose the write control
Open Settings in the project.Turn on Create & edit records for forms or record updates. Turn on Delete records only if the app needs to delete records. These are separate controls.
2
Save and describe the feature
Click Save changes, then ask Wisty for the record action. For example:Wisty can also ask you to enable the required access through an Allow access card in chat.
3
Test the change
In Preview, use the new form or action on an appropriate test record. Review the proposed change in the approval dialog before confirming.Check the record in Salesforce afterward to confirm the intended result.
4
Publish when ready
Publish the app or publish changes after testing. The published version includes the access settings you saved.If you enable writes after an app is already published, you need to publish again before viewers can use them.
Review a proposed change
The approval dialog names the action, object, and number of records. For creates and updates, review the fields and proposed values. For a batch, step through its records before approving.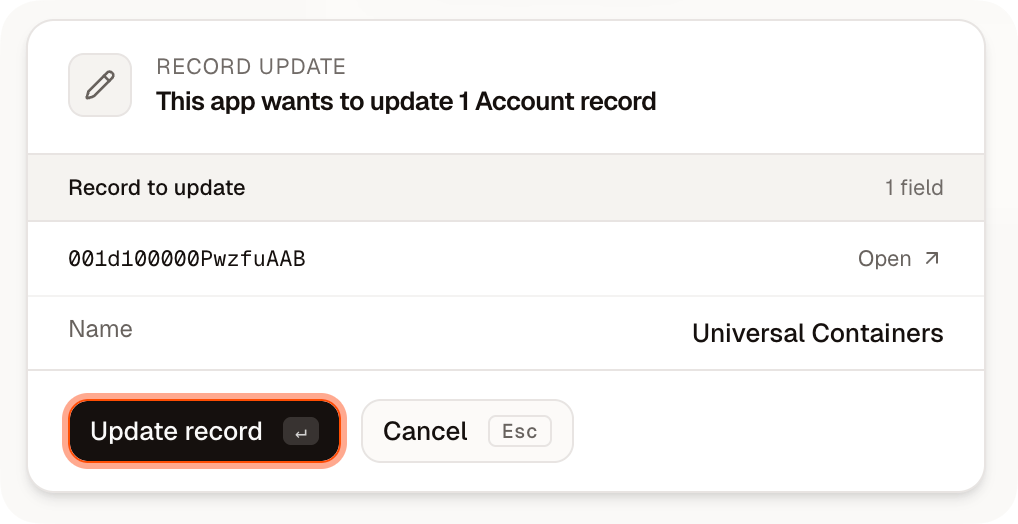
The dialog shows the record, the field, and the proposed value before anything is sent to Salesforce.
Choose whether to be asked again
On a published app, open the menu beside the approval button to choose an option such as Update and don’t ask again. That choice applies to the operation, not just the displayed record or object. For example, auto-approving updates allows later updates in that app and org without another prompt, within your Salesforce permissions. Creates, updates, and deletes have separate auto-approval choices. Each viewer controls their own choices. Publishing a new version requires viewers to approve again.Turn off auto-approval
- Open the published app’s Settings gear in its dock.
- Find the operation under Auto-approved writes.
- Click Turn off.